The Best Bread and Bagel Knife is a Great Gift

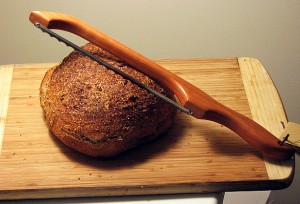
Bread Bow KnifeWhen you bake your own bread and love to eat it straight out of the oven, you know how hard it is to get a good, even slice from fresh-out-of-the-oven, warm bread. This Oregon Bread and Bagel Knife (another non-essential but really cool kitchen tool), made of Red Alder, a sustainable hardwood, has a beveled, scalloped edge (it never needs sharpening) that works like a super-sharp saw to cut a neat, uniform width slice of that crusty, aromatic freshly baked no-knead sourdough whole wheat pumpkin seed encrusted loaf that you can then slather in butter and watch as it melts into the nooks and crannies…ok, I’m getting a little carried away here, but there really is nothing better then homemade bread.

This knife is also perfect for cutting bagels, ripe tomatoes and just about anything else that you may have trouble slicing with a conventional knife…and, with the beautiful Red Alder handle, a hardwood that flourishes in the Pacific Northwest, it looks really great just sitting there on the kitchen counter or even hanging on your kitchen wall. It has an American-Made stainless steel blade that is double-ground, serrated & ultra-thin, the same blade that is used in industrial bread slicers that make thousands of slices a day.


This also makes a great gift for the cook who has everything…that’s how I got it (thanks Ned and Debi)!


Sausage, Mushroom and Caramelized Onion Pizza with a Sourdough Whole Wheat Crust

SMO PizzaI’ve been getting a lot of pizza questions recently, so I just wanted to re-post a pizza story I did a while back. This was, of course, made from scratch (here’s the recipe) and it really tasted just as good as it looks. One of the most important tricks to making a great pizza is using a pizza stone…you just can’t bake a great crust without it. A pizza stone has a greater thermal mass then either a glass or metal pan and therefore holds and distributes heat better. It’s also porous, so it absorbs moisture from the dough as it cooks, all of which contributes to an amazing, crisp, uniformly browned crust. Also, definitely get yourself a pizza peel…they’re inexpensive and make putting the pizza into the oven a breeze.

Pizza stones are available just about everywhere, and come in a variety of sizes and shapes (and prices). They should be put in a cold oven, then preheated for at least 30 minutes before using. Because they are porous and absorb liquid, the stone should never be washed with soap…just a dry brush or some plain, warm water if needed. They are also ideal for baking bread.

t stone or piece of ceramic or earthenware used to evenly distribute oven heat to pizzas or other baked goods, more or less mimicking the effects of cooking a pizza in a masonry oven. Such bakeware has more thermal mass than metal or glass pans. The porous nature of the stone used also helps absorb moisture, resulting in a crisp crust.
Suasage, Mushroom, Caramelized Onion Pizza ready for oven
Ready for the Oven

Nothing better then homemade pizza and this crust is simple and delicious. If you need sourdough starter, check out my bread post from last week. I prefer thin crust pizzas (being from the New York area…where we make REAL pizza), but if you prefer a thicker crust, it’s all here in the printable recipe. This is one of those recipes that appears to be a little vague at first, but once you try it and get the feel for how the dough should come together, it’s simple and quick to replicate whenever you get the urge…which for me, seems to happen about 3-4 times a week lately. And since the recipe makes 3 crusts which freeze incredibly well, you actually don’t have it make it that often. Just take one out of the freezer, and in about 3 hours, it’s ready to roll. The crust is also vary versatile and can be used in dozens of different ways. Just the other day, I topped one with just caramelized onions, crumbled goat cheese and drizzled some olive oil on it and it was amazing. It also makes a great calzone!

Please click here for the printable recipe.

Papaya Banana Blueberry Orange Hawaiian Smoothie

Blueberry Papaya Banana Orange SmoothieWell, we’re back in Hawaii, so it’s Fresh Fruit Smoothie time…they’re simple to make, they taste great and have the consistency of creamy soft serve ice cream. For this one, I took fresh picked papayas and bananas, cut them into 1/2 inch chunks and froze them overnight. To make the smoothie, put about a cup of frozen papaya chunks, a cup of frozen banana chunks,  6 oz. of  your favorite blueberry yogurt (I use Dannon) into a blender and add about 3/4 cup of fresh squeezed orange juice  (if you don’t have orange juice, V8 Splash is a great alternative…it’s available everywhere. I use their Tropical Blend, but any flavor will do). Pulse the blender for about 30 seconds, give it a quick stir (make sure the blades have stopped!), and repeat a few times. It should be very thick at this point, so to get the perfect consistency, take the top off the blender while it’s running (make sure all the fruit has been pureed before you do this or you may end up wearing some smoothie) and slowly pour in a little more juice until you see a vortex form in the center-you’ll know what I mean when you see it happen-and the Smoothie will be perfect. If you love peanut butter like I do, you can add a heaping tablespoon (I prefer chunky) and blend for a couple of seconds more…it’s incredible!

The Best Way to Peel a Potato

Leave it to Mary Ann from Gilligan’s Island to show us the best way to peel a potato. Every Thanksgiving, we make a ton of mashed potatoes for 40 people and the only thing we don’t look forward to is peeling all those potatoes. Well thanks to this video from Mary Ann, it looks like next Thanksgiving that won’t be a problem. Now if we can just get the Professor to invent an easy way to deep fry a turkey without burning down the entire neighborhood.

BTW, if you really want to do it the authentic “Mary Ann” way, here are the Red Silicon Gripper Tongs she uses in the video. They’re great for using with non-stick cookware and they’re heat resistant up to 600° and dishwasher safe.

Girl Scout Cookies…Recipes to Make Them At Home

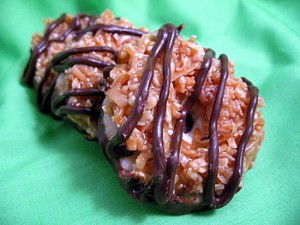
For those of you that are freaking out over the news that the Girl Scouts are cutting their cookie line-up down to six varieties because of the stale economy (this is huge national news…just check out The Wall Street Journal), there is help online. One of my favorite blogs, Baking Bites, has a great post on how to make your own. And if your favorite cookie isn’t covered in that post, check out Chow. Fijis, Slim Mints, Do-Si-Dos, Samoas, Tagalongs…they’re all there for the making. Even if your favorite isn’t being scratched from the line-up, you should give these recipes a shot. Like most things, they really taste better when you make them yourself.

Roasted Chicken and Cauliflower – Easy, Quick, Healthy and Cheap

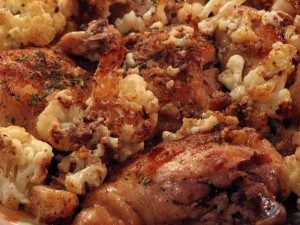
Roasted Chicken and Cauliflower This is my favorite kind of recipe…Easy, quick, healthy and cheap…but best of all, it just tastes great. It’s easy because it uses just a few basic ingredients…it’s quick, with a prep time of about 15 minutes and a total time of about 40 minutes…it’s healthy because cauliflower is high in fiber and a good source Vitamin C and folate…and cheap, well, because the ingredients don’t cost too much. If you prefer the flavor of Balsamic vinegar, you can substitute that for the Sherry vinegar in the final step…either way, it’s delicious!

Please click here for the printable recipe.

Crustless Broccoli Quiche….Low Carb and Still Delicious

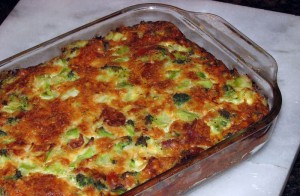
OK…I personally could care less whether this is high-carb, low-carb or no-carb…all I know is that it tastes (and looks) great, is really simple to prepare and you can just pop a slice in the microwave for a quick breakfast. If you happen to live with someone who cares about carbs (like I do), the best thing about this dish is that you can really enjoy it together (you don’t have to fake it)…it’s that good! If you want an even healthier version, just substitute Eggbeaters for the eggs. And for a great variation, replace the onions with a cup or two of caramelized onions…it really adds a ton of flavor to the quiche.

Please click here for a printable copy of the recipe.

Simply Sensational Caramelized Onions

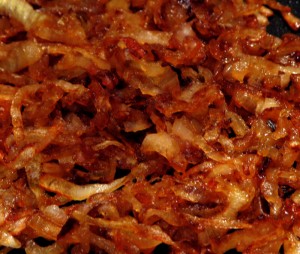
Caramelized onions are terrific on everything… pizza, burgers, hotdogs, chops, steaks, brisket and are delicious in scrambled eggs, quiche or mashed potatoes….they even make an interesting (and delicious) dessert when served on sliced apples with a side of cheese. In fact, they’re great all by themselves…I guarantee you’ll find yourself eating them right out of the pan.

I think that I first read about this technique for caramelizing onions in Cook’s Illustrated Magazine years ago and have been using it ever since.

When onions are cooked low and slow for an extended period of time, the natural sugars in the onions caramelize, imparting an intense sweet flavor and a beautiful deep mahogany color.

Caramelized onions can be stored in an airtight container in the refrigerator for up to 2 weeks or they can be frozen for up to 3 months.

Please click here for the printable recipe.

OXO Pop Up Vegetable (and Chicken Wing) Steamer

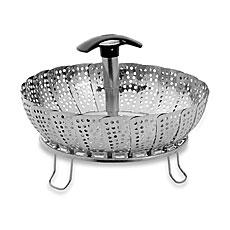
OXO Vegetable SteamerAlthough I did post a technique a while back for simply steaming a small quantity of vegetables, there are times when that method isn’t practical (like for prepping my Oven Baked Buffalo Chicken Wings). For these times, I highly recommend the Oxo Good Grips Pop-Up Steamer.

All you have to do is press on the handle and it pops up to make it safe and easy to insert into and remove from a steaming pot. One of the best feature is that you can unscrew the handle and it’s then perfect for steaming larger items like fish fillets (or huge batches of chicken wings!). It has foldable feet to keep the basket above the boiling water and it also expands to fit just about any pot. It’s a really cool kitchen tool with multiple uses…a practical (and inexpensive) addition to any kitchen!

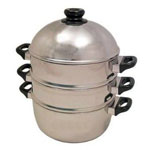
And, if you really want to steam a huge batch of wings this simple, Asian-style 3 Tiered Aluminum steamer is great…it’s also perfect for steaming a couple of different vegetables (or a variety of seafood) all at the same time for a quick, healthy dinner.

Hearty Tuscan Bean Stew

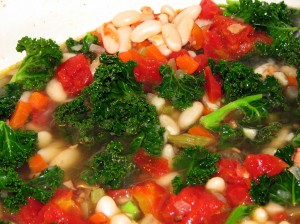
Once again, it’s been snowing like crazy here on the east coast, and there is nothing more satisfying and delicious after shoveling out your car (for what seems like the bazillionth time this winter) then this Hearty Tuscan Bean Stew from Cook’s Illustrated. I think it’s best when made with kale (pictured here), but a mixture of greens is also great. This is one of those simple, healthy, pretty much foolproof recipes that seems to come out perfect every time (the secret is cooking it in a good, heavy duty dutch oven). If you’re more into soups then stews, just add another cup of chicken broth and 3/4 cup of water when you add the greens. A big bowl of stew, topped with grated Parmesan cheese and served with a toasted piece of crusty garlic bread makes an amazing meal. I also always add a couple of squirts of Sriracha sauce for a little spicy, garlicky kick.

Another great thing about this stew is that it freezes perfectly. Just divide it into serving size portions, freeze, and when you get a craving, just pop it into the microwave for a couple of minutes and it tastes as good as the day it was made.

Please click here for a printable copy of the Hearty Tuscan Bean Stew recipe.