Quinoa with Sautéed Vegetables and Caramelized Onions

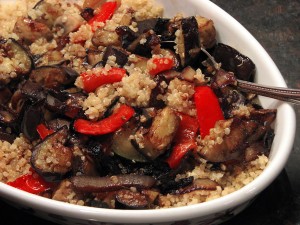
Quinoa (keen-wah). If you haven’t tried it, you really should give it shot. It’s a pseudocereal with a slightly nutty flavor, which makes it a great alternative to rice. Quinoa is extremely nutritious and has a very high protein content (12%–18%), making it a healthy choice for vegetarians, vegans and athletes.  Unlike wheat or rice, which is low in lysine, quinoa contains a balanced set of essential amino acids, making it an unusually complete protein source. And the best part about it is…it tastes great! For this recipe, we prepared it like you would rice and mixed it with sautéed vegetables and caramelized onions for a quick, delicious healthy meal. You can use any vegetables you like in this dish…everything seems to go well with quinoa and you can find it just about anywhere these days…Nature’s Earthly Choice is a great brand.

Please click here for a printable recipe.
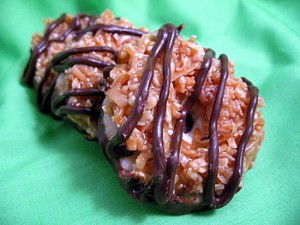
DIY Girl Scout Cookies – How to Make Them at Home

It’s that time of year again…Girl Scout Cookies are on sale! For those of you that are still bummed out over the news last year that the Girl Scouts cut back on the varieties (it was huge national news…just check out The Wall Street Journal), there is help online. One of my favorite blogs, Baking Bites, has a great post on how to make your own. And if your favorite cookie isn’t covered in that post, check out Chow. Fijis, Slim Mints, Do-Si-Dos, Samoas, Tagalongs…they’re all there for the making. Even if your favorite wasn’t scratched from the line-up, you should give these recipes a shot. Not only do they taste better when you make them yourself, but you also get a wonderful feeling of accomplishment that helps negate that horrible feeling you get when you look in the mirror after gorging yourself on them. And after you’ve had your fill of Girl Scout cookies, check these out, the Best Chocolate Chip cookies ever invented!

Crispy Crunchy New Jersey Diner Home Fries

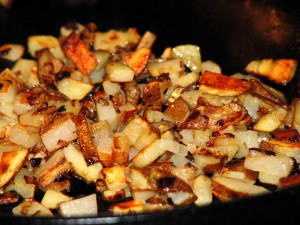
Crispy Crunchy New Jersey Diner Home Fries! These are a great addition to any breakfast, but with a couple of eggs and some bacon and toast, you feel like you’re having breakfast in a classic New Jersey diner (and make no mistake about it…there are no better diners than Jersey diners). They’re extremely simple (and fast) to make…just 1/4 inch dice two medium-sized russet potatoes (about 2-3 cups) and a small onion (about 1/4 cup). Place the diced potatoes in the microwave, cover, and cook on high, for about a minute until partially cooked, stirring halfway through to ensure even heating. Heat up a skillet (preferably a cast iron one), add a couple of tablespoons of vegetable oil and/or butter (and if you are also making bacon, use about 1-2 tablespoons of the bacon grease instead of the oil…it adds tons off extra flavor), toss in the potatoes and onions, season liberally with salt and pepper and let them fry over medium-high heat, stirring occasionally, for about 8-12 minutes until golden brown. I use a cast iron bacon press to press them down between stirs so they crisp up faster and more evenly, but it’s not necessary. That’s all there is to it…try these and you’ll agree that, for great breakfast potatoes, it really doesn’t get any better than Crispy Crunchy New Jersey Diner Home Fries!

Valentine’s Day Chocolate Bag of Treats

chocolate bagsHere is one of the all-time great Valentine’s Day recipes (and it’s not really a recipe…more like a really impressive technique). I actually made these for the first time years ago, long before I really got into cooking, so although it might look like it’s hard to prepare, it really isn’t…and it’s a lot of fun!

1. Get a few coffee-bean bags from your grocery store. You need bags that are lined with a plastic coating so after being painted with chocolate, you can peel them off easily. Cut the coffee bags so they are about 3-5 inches tall.

2. Then, in a double boiler over low heat, melt 2-3 cups of semisweet chocolate morsels.

3. Lay the bag on its side and with a pastry brush, starting at the bottom, paint the melted chocolate over the entire interior of the bag. Use plenty of chocolate to get a nice thick coating, which will make it less likely for the chocolate to break when peeling off the bag.

4. Stand the bags up and place in the refrigerator for at least 30 minutes. They can be left in there until you need them.

5. When the chocolate is nice and hard, starting in one corner, gently peel away the bag. Use a scissor to cut the paper off as you peel it…it just makes it easier.strawberries and bags

6. Melt some more chocolate and dip strawberries, sliced bananas and whatever else your significant other loves into the melted chocolate. Lay them down on waxed paper to dry and harden. As very cool added touch, you can also melt some white chocolate and use that to drizzle designs on the dipped treats.

Then just fill the bags with the treats and your favorite candies and you have an incredibly impressive presentation for your loved one on Valentine’s Day. It sure sealed the deal for me!

Oven Baked Buffalo Chicken Wings – A Great Super Bowl Party Recipe

Buffalo Chicken WingsOne more great Super Bowl Party Recipe repost…but first, the backstory. Back in 1976, I was working at The Foundry restaurant in DC and one of the waiters, Michael Murphy, who happened to be from Buffalo, told us of the amazingly simple way they prepared, of all things, chicken wings, up there at a place called the Anchor Bar. We started giving away the Buffalo Chicken Wings during Happy Hour and immediately the place became packed each day at around 4:45 pm with everyone waiting for the wings to come out of the kitchen…and the rest is culinary history. It seems that every bar today has chicken wings on the menu, and for good reason…when they’re made right, they’re incredibly and addictingly (if that’s even a word) good! They’re actually very simple to make…cut 12 wings into three pieces at the joints (discard the wing tips or keep them for preparing stock) and just deep fry the flats and drummettes for 10-12 minutes in 375 degree oil (preferably peanut) until they’re crispy and golden brown, toss them in Frank’s Red Hot Sauce and serve with celery and bleu cheese dressing…that’s it…nothing else is needed. The problem is that it’s really a pain (and a greasy mess) to deep fry at home, so here is the secret to the best way to avoid that mess, while still getting that great Buffalo Chicken Wing crunch and flavor… Read More …

Super Bowl Special – GIANT Pulled Pork Sandwiches

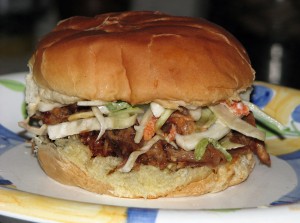
I’m reprising this post because this is a great recipe for a Super Bowl party…slow cooked, pulled pork sandwiches topped with my grandmother’s amazing Cole Slaw. The best thing about this pork recipe is it’s done in a slow cooker. The prep is really simple, the cooking is low and slow (it can be done overnight), the resulting flavors are incredible and, best of all, it makes dozens of sandwiches with very little effort…perfect for a party. And if any pork is left over (not likely) just divide it up into serving size portions (4-6 oz each), wrap in plastic wrap and freeze them. When you get that irresistible craving for a pulled pork sandwich,  just pop one in the microwave, top it with some bbq sauce, put it in a steamed bun, slap on some cole slaw and, in minutes, I guarantee you’ll be wallowing in the throes of pulled pork nirvana!

Click here for Cookhacker’s printable Pulled Pork recipe.

Click here for Grandma Molly’s Legendary Homemade Cole Slaw recipe.

Caramelized Onions, Sausage and Mushroom Sourdough Whole Wheat Pizza

SMO PizzaGot a few pizza questions recently, so I just wanted to re-post a pizza story I did a while back. This was, of course, made from scratch (here’s the recipe) and it really tasted just as good as it looks. One of the most important tricks to making a great pizza is using a pizza stone (or even better, a pizza baking steel, which is what I use exclusively now)…it’s hard to bake a great crust without it. Both the stone and the steel have a greater thermal mass then either a glass or metal pan and therefore hold and distribute heat much more efficiently. The stone is also porous, so it absorbs moisture from the dough as it cooks, all of which contributes to an amazing crisp, uniformly browned crust. Also, definitely get yourself a pizza peel…they’re inexpensive and make putting the pizza in and taking the pizza out of the oven a breeze.

Pizza stones and steels are available just about everywhere, and come in a variety of sizes and shapes (and prices). They should be put in a cold oven, then preheated for at least 30 minutes after the desired oven temperature (I recommend 500°) is reached before using. Because the stones are porous and absorb liquid, the stone should never be washed with soap…just a dry brush or some plain, warm water if needed. Both the stone and the baking steel are ideal for baking bread.

t stone or piece of ceramic or earthenware used to evenly distribute oven heat to pizzas or other baked goods, more or less mimicking the effects of cooking a pizza in a masonry oven. Such bakeware has more thermal mass than metal or glass pans. The porous nature of the stone used also helps absorb moisture, resulting in a crisp crust.
Suasage, Mushroom, Caramelized Onion Pizza ready for oven
Ready for the Oven

Nothing better then homemade pizza and this crust is simple and delicious. If you need sourdough starter, check out my bread post from last week. I prefer thin crust pizzas (being from the New York area…where we make REAL pizza), but if you prefer a thicker crust, it’s all here in the printable recipe. This is one of those recipes that appears to be a little vague at first, but once you try it and get the feel for how the dough should come together, it’s simple and quick to replicate whenever you get the urge…which for me, seems to happen about 3-4 times a week lately. And since the recipe makes 3 crusts which freeze incredibly well, you actually don’t have it make it that often. Just take one out of the freezer, and in about 3 hours, it’s ready to roll. The crust is also vary versatile and can be used in dozens of different ways. Just the other day, I topped one with just caramelized onions, crumbled goat cheese and drizzled some olive oil on it and it was amazing. It also makes a great calzone!

Please click here for the printable recipe.

Steel Cut Oatmeal – The Simple Overnight Method

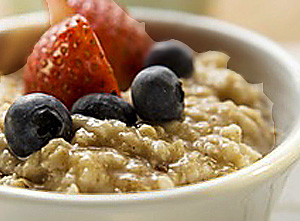
On a cold winter morning, there is no better breakfast than a bowl of hot, chewy steel cut oatmeal. The problem with steel cut oats is that it can take awhile to cook. The solution is quick and easy…use the overnight method. Heat 1 tsp. of butter in a 2 qt. saucepan, add 1 cup of steel cut oats and fry while stirring for 3 minutes until they smell “toasty”. Add 3 cups of water and a pinch or two of salt, stir and bring to a rolling boil. Then turn off the heat, cover the pan, and let sit covered overnight on the stovetop. When you wake up in the morning, just reheat a portion on the stove or in the microwave and its ready to go. After reheating, you can also add dried cranberries, blueberries, strawberries, bananas, brown sugar or whatever you like  for an amazing breakfast. And if you like, you can double the recipe and save the leftover cooked oats in a container in the fridge; they will keep for 4-5 days and all you have to do is reheat in the microwave for a quick healthy, wholesome, delicious breakfast in just a couple of minutes.

Tip of the Day – Just Put Sriracha on Everything!

Sriracha SauceToday’s tip is simple…just put Sriracha sauce on everything you eat to make it better. Of course, you have to like heat, but this condiment is so hot right now (see what I did there?) because it puts a kick (and a ton of flavor) into anything you use it on. It’s available just about everywhere and you can even make it yourself…here is a great recipe from Food52. And, if you need some ideas, here are 100 Sriracha recipes from the folks at EndlessSimmer, 25 more from BonAppetit and one for delicious Sriracha Cilantro Scallion Deviled Eggs from The Garden of Eating…that should keep you busy for awhile!

Tip of the Day – Never Refrigerate Bread…Freeze It!

Sourdough Whole Wheat BreadThe best way to keep bread is at room temperature. After 2-3 days, you should wrap the bread well, put it in a freezer bag and freeze it.  Never store any bread in the refrigerator, because the cold temperature (38º-40º) accelerates the crystallization of the starches, causing the bread to stale much faster. When I bake a bread, as soon as it cools completely, I cut it, freeze half immediately and keep the other half cut-side down on a cutting board covered with a clean cloth. When that’s consumed, I take out the frozen half, defrost it at room temperature or wrap it in foil and bake in a 450º oven for 10 minutes and it tastes just as good as the day it was baked.