Sourdough Whole Wheat Pumpkin Seed No-Knead Bread

I have been experimenting lately with recipes for a simple no-knead whole wheat bread and I think I’ve come up with a one that seems to be pretty foolproof and gives consistently great results. Some sourdough purists might object to the use of instant rise yeast in addition to the sourdough starter, but I think for the novice sourdough baker, it insures that you’ll  get a good initial rise and excellent oven spring with an amazing sourdough taste. I’m currently using Carl Griffith’s sourdough starter, a strain of starter that is over 160 years old that can be obtained for a FREE at this address. This recipe is adapted from one on the amazingly informative Breadtopia website and solves the common problem of a too “wet” no-knead dough.  I recommend watching this excellent video at Breadtopia.com before making this bread…it  does a great job of demonstrating the techniques needed to make an incredible no-knead bread.

If you are just starting out baking bread, this is a great baking kit to start with. It includes a 9″ rattan banetton (bread proofing basket) with its linen liner (so dough doesn’t stick), a bread lame for scoring, and a dough scraper…just about everything you need to get started.

Click here for the recipe with photos.

Cookhacker’s Sourdough Whole Wheat Pumpkin Seed No-Knead Bread

Yields one 1 ¾ lb loaf
Course Side Dish
Cuisine American
Prep Time 18 hours
Cook Time 45 minutes

Ingredients

  • 340 grams (12 oz) All Purpose or Bread Flour
  • 142 grams (5 oz) Whole Wheat Flour
  • 321 grams (11.5 oz) Water
  • 62 grams ¼ cup Active Sourdough Starter
  • 1/8 teaspoon Instant Yeast
  • ¾ tablespoon salt
  • 40-50 grams lightly toasted pumpkin seeds and/or sunflower seeds...I use a combination of both
  • Vegetable Spray

Instructions

  1. Combine the two flours and salt in a large mixing bowl. In a large measuring cup, add the water, sourdough starter and the instant yeast and stir to combine.
  2. Add the wet ingredients to the dry ingredients and stir until mixed well (a dough whisk is the best tool for the job, but a wooden spoon works well also). Cover with plastic wrap and let the dough rest at room temperature for about 14 hours.
  3. At this point the dough should about doubled in size and be nice and bubbly on the surface. Flour your work surface and place the dough on it. Gently spread the dough out to about a 8” by 12” rectangle and sprinkle about a quarter of the pumpkin seeds across the surface of the dough. Then, as you fold the dough in thirds (as shown in the Breadtopia video) scatter each surface with more pumpkin seeds as you fold and then do a quarter turn of the dough and fold in thirds again and form into a ball. Top the dough ball evenly with the rest of the seeds and cover with plastic wrap and let rise for 15 minutes.
  4. Spray the proofing basket with the vegetable spray and sprinkle generously with wheat bran to prevent sticking (you can use cornmeal in place of the wheat bran). Flour your hands and invert the dough ball, seed side down, into the proofing basket, cover with a dish towel and let rise until doubled…about two hours. When you can poke your finger gently into the dough and if it doesn’t spring back, the dough is ready.
  5. About 30 minutes before the dough is ready, preheat the oven to 450 degrees. Put a 4-8 quart covered cast iron Dutch oven in the oven as it heats. When the dough is ready to go, gently invert the dough on a large piece of parchment paper. Carefully remove the hot Dutch oven, uncover it, lower the dough on the parchment paper into the Dutch oven, cover quickly and place back in the oven (if you don’t have parchment paper, the dough can be gently placed directly into the Dutch oven…just be careful).
  6. Cook covered for 20 minutes, then uncover and continue cooking till the bread reaches an internal temperature of about 200-210 degrees and is nicely browned, approximately 25 more minutes.
  7. Remove the bread and place on a cooling rack, let it cool for at least an hour (it continues cooking internally...cut it too soon and it will be "gummy") and in about 1 hour it’s ready to eat.
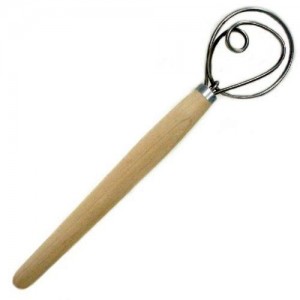
Danish Dough Whisk…a very cool bread baking tool

This Danish Dough Whisk is an indispensable tool for mixing dough by hand prior to kneading. It’s long, thick wooden handle provides a great ergonomic grip, which gives you the leverage you knead for easily blending a stiff bread dough. Because of it’s funky shape, it’s much more practical and efficient then a wooden spoon for mixing heavy sticky doughs, and as an added benefit, it’s way easier to clean!

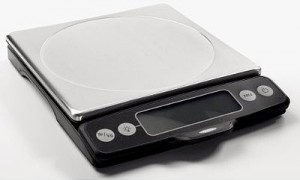
OXO Good Grips Food Scale…a must have tool for the kitchen

OXO food scale This is one of the kitchen tools that I can’t live without…the OXO Good Grips Food Scale. It has large, backlit, easy to read numbers and, with one click,  switches from metric to U.S. (avoirdupois) weight. When you press the zero button (tare weight) to set the scale back to zero, you can continue to add ingredients and then zero it out again, so all your mixing and measuring can be done in one bowl. One of the best features is that the display can be separated from the base (it’s attached by a long wire) so even if you weighing a huge bowl or plate, you can still easily see the readout. If you bake, you know how important weights and proportions are to achieve a great result…this is the  real deal!

Killer Chocolate Chip Banana Bread

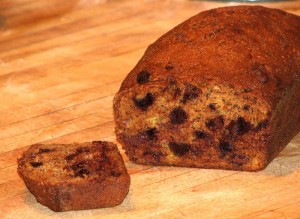
The bananas on the trees are ripening quickly and we are awash in a plethora of fruit, so we’re scrambling to come up with great banana recipes. Ripened bananas in their skin, wrapped in saran wrap, will keep in the freezer for up to six months for use in breads, cakes and smoothies, but it’s more fun to try and keep up with the rapidly ripening crop (it’s a race we can’t possibly win). Tonight, not only did we dehydrate them for banana chips, but also made this killer Chocolate Chip Banana Bread, a simple recipe that yields a moist, tasty, chocolatey loaf.  You can also add a little cinnamon, rum or vanilla if you like, but there really isn’t any reason to since it is delicious (and addictive…we can’t stop eating it) as is.

Please click here for the printable recipe.


A Really Great Knife at a Really Great Price

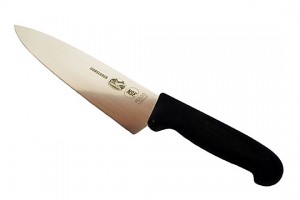
Now that I showed you the best tool to sharpen your knives, let me tell you about a really great knife that has the added benefit of being very inexpensive. I love my Henkel and Wüsthof knives, but for real value and exceptional quality, I recommend the Victoronix Fibrox 8″ Chef’s Knife. It has a stamped, high-carbon stainless steel blade and, although it doesn’t have quite the weight of a forged blade, it feels good in your hand, has nice balance and excellent edge retention. You can’t go wrong with this knife…it’s really a pleasure to use. And here is a great, FREE way to keep your knives sharp.


Food Shopping…Getting a Good Deal and a Great Meal

Full CartOne of the great ways to force yourself out of the rut of always cooking the same thing is to let your shopping dictate your menus. This technique accomplishes two things…it not only expands your horizons food-wise and adds variety to your meals, but it also saves you a lot of money…a win-win situation.

Here’s the way this works…it’s simple. First, you get your weekly flyer from the local supermarket and see what’s on sale. It doesn’t matter that you never cooked a picnic pork shoulder (or even heard of one)…if it’s on sale for 49 cents a pound, you’re buying it. The next thing you do is get on the internet (I know you know how to do that…you’re here, aren’t you?) and search for recipes for whatever is on sale that week. You’ll be amazed to find that no matter what you buy there are about a bazillion recipes for it, at least one of which I guarantee you’ll want to try. After a while, you’ll start seeing which sites and blogs have great recipes that suit your tastes…bookmark them and make them your go-to sites. Remember that pork shoulder you bought for 49 cents a pound…well, here you go…see, it really works!

One of the great joys of cooking is experimenting and trying something new…give it a shot. The worst thing that could happen is you’ll save a little money and add some much-needed diversity to your dining.

Knife Sharpening…The Best Tool for the Job

I love my knives and, as incongruous as it might sound, a sharp knife is a safe knife. When a knife is dull, more pressure  is needed when using it and that increases the chance that the knife will slip and do some damage…a sharp knife is not only much easier to control, but it really adds to the joy of food preparation.

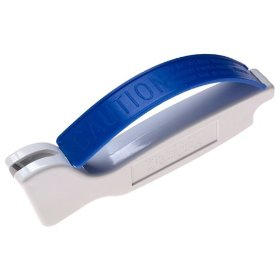
Sharpening a knife using a sharpening stone is best left to professionals. It’s a great skill to learn, but it takes a lot of practice as it’s tough to get the proper angles. The Accusharp Knife and Tool Sharpener is an inexpensive, safe and easy to use tool that makes knife sharpening a pleasure. It has diamond honed Tungsten Carbide sharpening blades set at the proper angle so you can’t make a mistake, and in about 10 seconds, you have a nice, sharp edge.

The are a lot of myths and facts about knife sharpening, but if you use the right knife for the job and you keep it sharp, you’ll find food prep to be a pleasure.

No need to go crazy buying knifes. I recommend starting out with a good quality 8″ chef’s knife (the workhorse!), a 3″ paring knife, a 5 1/2″ boning knife, 5″ Tomato/Utility Knife, an 10″ serrated bread knife and a honing (sharpening) steel. Just make sure you store them properly (I love my magnetic knife holder) and you should be ready to tackle any kitchen cutting job with ease.

Cheaper and Neater Cooking Oil…another Really Cool Tool

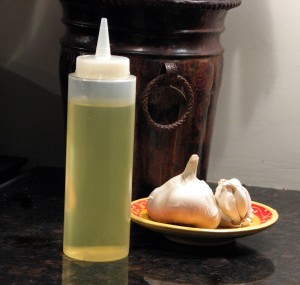
Plastic Squeeze BottleCheaper and neater cooking oil…to get it, all you need is another of our unessential-but-cool-to have tools in the kitchen…the simple plastic squeeze bottle. It’s one of those diner/restaurant tricks that makes life in the kitchen just a little simpler. Just fill it with your favorite type of cooking oil, and with just a quick spritz in a hot pan you’re ready to sauté. The great thing about it is, not only is it much neater than pouring straight from the container (and you know you hate that oil slick that always forms on the bottom of the cabinet it’s stored in) but you can also buy a huge container of oil at a really inexpensive price from Amazon and just refill your squeeze bottle when needed (that’s the way we do it in the restaurant). This trick also is great for ketchup. You can buy the 112 oz. restaurant-size container of Heinz at Amazon for about half of the cost per ounce of the standard size you find in the supermarket. Squirt it on your hamburger and on your homemade Crispy Spicy Oven-Baked Garlic French Fries at home just like you’re in your favorite diner. It’s also great for balsamic vinegar…a spritz of that and a squeeze of olive oil and your salad is ready to go.  Simpler, neater and way less expensive…what’s not to like?

Save

Save

The Aerolatte – Another Really Cool Tool

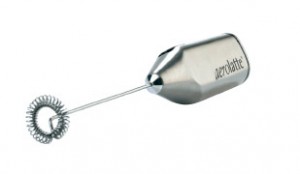
Another one of my favorite unessential-but-cool to-have utensils, the Aerolatte,  makes a great cappuccino and really adds to the enjoyment of your morning coffee. It’s fast, inexpensive, easy to use and simple to clean. One of the cool things I do is add flavorings to the milk before I froth. This morning I sprinkled in some cinnamon and a little sugar before I frothed and it made an amazing topping for my French Roast coffee. Also, immediately after frothing, I put the mixture in the microwave for about 15-20 seconds (keep an eye on it because it will expand quickly) and then top my coffee with it for a nice warm, delicious first sip to start the morning. It also makes a great gift (that’s how I got it…thanks to my sister) for any coffee lover.

Cool Tool…The Cast Iron Bacon Press

You gotta CRUSH that bacon flat!

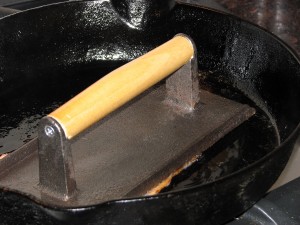
One of the great all time nonessential-but-cool-to-have kitchen tools is the cast iron bacon press. You use it to keep bacon from curling up as it cooks, and that makes it great for topping sandwiches (like killer BLTs, bacon cheeseburgers, grilled cheese and The Ultimate Breakfast Sandwich). Used in conjunction with a heavy, seasoned Lodge 12″ Cast Iron Pan (an essential addition to any kitchen because of its excellent heat retention and diffusion properties), it’s also perfect for weighting down chops, burgers or steaks while pan-frying, which helps to keep more of the surface area of the meat in contact with the pan. This  browns them more evenly and helps develop complex flavors and aromas via the Maillard Reaction, all while forming a tasty caramelized crust. The cast iron bacon press is magic!