 Awhile back I wrote about how important it is to have a great scale, like the OXO Good Grips Scale, and to weigh ingredients for consistent results. As you’ve probably experienced, Americans seldom give weights in recipes, but in the UK, they almost always do. Well, over at Lifehacker, someone named Jesseg came up with an amazingly simple, yet inciteful, idea…when looking for recipes, search using google.co.uk, rather than google.com and the recipes you find will almost always have weights…just make sure you remember to convert Celsius to Fahrenheit, or your stuff may never get done!
Category: Secrets, Tips and Tricks
Oven Baked Spicy Crispy French Fries
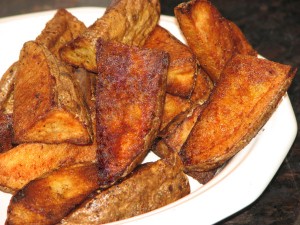 Everyone loves french fries, but deep frying at home is messy and the clean up sucks. These oven baked fries are just as tasty, a little bit healthier and way easier to make and clean up after than the deep-fried variety. The secret is the pre-soak that removes some of the starch and helps the fries to crisp up on the outside while staying tender and moist on the inside. Pair these with my Oven Baked Buffalo Chicken Wings and you have a great finger-licking good, faux deep-fried, quasi-healthy meal that everyone will love. If you prefer thinner, crispier garlicky oven baked fries, please click here.
Please click here for the printable recipe.
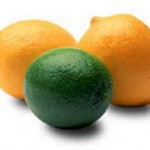
Tip of the Day – Juicing a Lemon or Lime
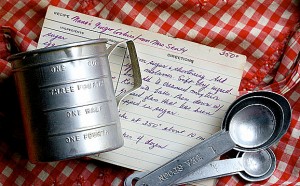
Cooking Weights and Measurements Conversion Charts
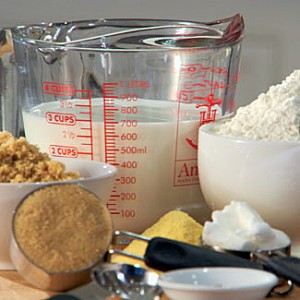 When a recipe calls for a cup of flour, most people just scoop out a “cup” and then level it off with a knife…easy and fast but, unfortunately, not very accurate or consistent. A little too much flour here or sugar there, and instead of a delicious chewy cookie you could end up with rockhard paperweight better suited for self-defense then dessert. That’s why weighing ingredients, especially when baking, is essential. A great scale, like the OXO Good Grips Scale, is an important tool for success in the kitchen. I try to give ingredients in my recipes by both weight and volume, but if you encounter a recipe that doesn’t, King Arthur Flour has a really helpful Master weight chart for just about every commonly used ingredient in baking. If you need to convert to metric or vice-versa, just click here for some charts to help with converting metric equivalents or try this interactive Online Cooking Converter that converts cooking units instantly…it’s amazing! Once you start weighing ingredients, you’ll see an incredible improvement in outcomes and consistency.
Thanks to Good Housekeeping for the photo.
Everyone Loves Mom’s Amazing Pinwheel Cookies
 Everyone loves these cookies…that’s because they can be made to everyone’s taste. The basic recipe is really simple, but the beauty of it is that you can add any filling you like, so everyone gets what they want. From raspberry jam to cinnamon and sugar to chocolatey goodness, no one goes away disappointed…and they not only taste great, but they look incredible. The secret to slicing them into
  neat, perfectly round cookies before baking is to use dental floss (unwaxed and unflavored…although I guess you could go for a minty floss to accent the chocolate cookies…or not!). Just wrap it around the cookie logs and tighten it as if tying a knot to make a perfect, round cookie.
Please click here for the printable recipe.
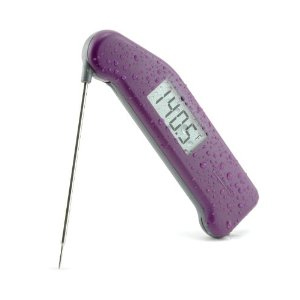
Thermapen Instant Read Thermometer…Best in Class
OXO Good Grips Scale – An Essential Kitchen Tool
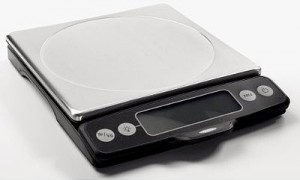 This is one of the kitchen tools that I really can’t live without…the OXO Good Grips Food Scale. It has large, backlit, easy to read numbers and, with one click, switches from metric to U.S. (avoirdupois) weight. When adding each ingredient to a recipe, just press the zero button (tare weight) to set the scale back to zero, add your next each ingredient, repeat for each additional ingredient, and all your mixing and measuring is done in one bowl, making for much easier cleanup. One of the best features is that the display can be separated from the base (it’s attached by a long, sturdy wire) so even if you’re weighing your ingredients in huge bowl that would normally hide the readout on a lesser scale, on this one, just slide it out and you can easily see the weight. If you bake, you know how important weights and proportions are to achieve a great result. I never bake without it, and I guarantee once you try it, you won’t either…this is the real deal!
Sourdough Starter – Drying and Reviving It (and how to get it for FREE!)
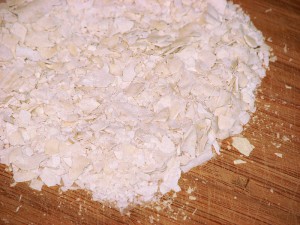 It’s always a good idea to have some dried starter on hand as backup if, for some reason, your “live” starter suffers an untimely death…it’s sad, but it happens. It’s also a great way to share your starter with someone. The drying process is very simple. Thinly spread some of your live starter on a sheet of parchment paper or plastic wrap…a pastry brush or spatula works well here…then just let it dry. When completely dry (it can take from a few hours to a full day, depending on temperature), just peel it off the paper and crush it up…a coffee or spice grinder works well or you can just put it in a zip lock bag and whack it a few times with a rolling pin (that’s the post-whacked state in the picture on the left). Store it in an air-tight zip lock bag at room temperature or in the refrigerator or freezer…it’s all good.
Now, if your ready to get started, you’re going to need some dried starter to start your starter, so check out my Sourdough Whole Wheat Pumpkin Seed No Knead Bread post where you’ll find the link to send for some Carl Griffith’s Sourdough Starter…it’s been around since 1847! I’ve been using it for 20+ years, it’s excellent, and you can’t beat the price…literally…’cause you can get it here for FREE!
Reviving your dried starter is a relatively simple process also. This great video clip is from Breadtopia, one of my favorite sites, and it shows you exactly how to do it. If you’re into bread and baking, you should definitely check out Breadtopia for amazing recipes and videos.
The Best Bread and Bagel Knife is a Great Gift
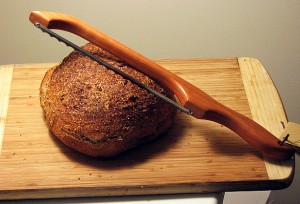 When you bake your own bread and love to eat it straight out of the oven, you know how hard it is to get a good, even slice from fresh-out-of-the-oven, warm bread. This Oregon Bread and Bagel Knife (another non-essential but really cool kitchen tool), made of Red Alder, a sustainable hardwood, has a beveled, scalloped edge (it never needs sharpening) that works like a super-sharp saw to cut a neat, uniform width slice of that crusty, aromatic freshly baked no-knead sourdough whole wheat pumpkin seed encrusted loaf that you can then slather in butter and watch as it melts into the nooks and crannies…ok, I’m getting a little carried away here, but there really is nothing better then homemade bread.
This knife is also perfect for cutting bagels, ripe tomatoes and just about anything else that you may have trouble slicing with a conventional knife…and, with the beautiful Red Alder handle, a hardwood that flourishes in the Pacific Northwest, it looks really great just sitting there on the kitchen counter or even hanging on your kitchen wall. It has an American-Made stainless steel blade that is double-ground, serrated & ultra-thin, the same blade that is used in industrial bread slicers that make thousands of slices a day.
This also makes a great gift for the cook who has everything…that’s how I got it (thanks Ned and Debi)!
The Best Way to Peel a Potato
Leave it to Mary Ann from Gilligan’s Island to show us the best way to peel a potato. Every Thanksgiving, we make a ton of mashed potatoes for 40 people and the only thing we don’t look forward to is peeling all those potatoes. Well thanks to this video from Mary Ann, it looks like next Thanksgiving that won’t be a problem. Now if we can just get the Professor to invent an easy way to deep fry a turkey without burning down the entire neighborhood.
BTW, if you really want to do it the authentic “Mary Ann” way, here are the Red Silicon Gripper Tongs she uses in the video. They’re great for using with non-stick cookware and they’re heat resistant up to 600° and dishwasher safe.
